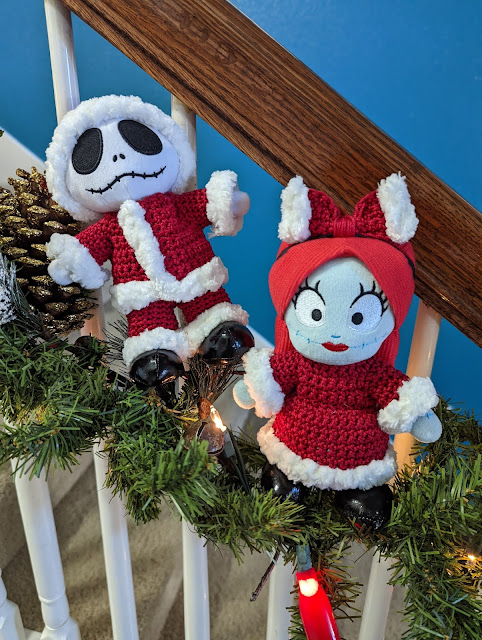
Crochet Mr. and Mrs. Santa Claus Outfits
Almost a month ago I crocheted some Santa hats for my nuiMOs. I had run out of my crochet thread I made for Jack's hat and so I had to dress him in what I had available. Well, I finally found some crochet thread at Michael's that was the perfect match! So I finally got to work on making Jack and Sally cute Mr. and Mrs. Santa Claus outfits. (Or Mr. and Mrs. Sandy Claws, whatever you'd like.) I'm so happy with how they turned out.
I'm going to be sharing the patterns on this blog post, so it's going to be a long one. Take your time when looking over and let me know if there are any mistakes. Please remember that these patterns are being shared for personal use only. Don't duplicate or make any products from these patterns for purchase. Thank you!
What You'll Need:
- Red crochet thread (super fine 1)
- Fluffy white yarn/material
- E Hook (3.50 mm)
- Scissors
- Needle
- Thread
- Crochet stitch counter
- Velcro, or some other kind of closure
- Elastic for bow
American Abbreviations:
- sc = single crochet
- ch = ch
- st = stitch
- tog = together
- *...* = repeat pattern within as designated
- sl st = slip stitch
MR. CLAUS' OUTFIT
PANTS:
Ch 26, sl st
Round 1: sc around (26)
Rounds 2-9: sc around (26)
Round 10: inc st, sc 11 st, inc st, inc st, sc 12 st, inc st (30)
*Start of Pant Leg:
Round 11: sc 15 st (15)
Round 12: start at the beginning of round 11 to form two holes. sc around (26)
Rounds 13-18: sc around (26) END
*Repeat rounds 11 -18 for other pant leg.
*Hand sew on fluffy detail.
COAT:
*If you've made my sweater pattern, this coat is done the same way. Only difference is your starting at the hem and going up vs. starting at the collar going down.
Body of Coat:
ch 37, turn
Row 1: sc across, ch 1, turn (36)
Rows 2-6: sc across, ch 1, turn (36)
SIDES:
Rows 1-2: sc 8 st, ch 1, turn (8)
MIDDLE:
Rows 1-2: sc 12 st, ch 1, turn (12)
Row 3: sc 8 st, ch 4 skip 4 st, sc 12 st, ch 4 skip 4 st, sc 8 st, ch 1, turn
Row 4: sc across, ch 1, turn (36)
Row 2: *sc, tog* x 12 (24)
Sleeves:
Round 1: sc 12 st around hole (12)
Rounds 2-7: sc around (12) END
*Hide all of your loose ends. For the fluffy parts hand sew them onto the coat. Same goes for the velcro/closure.
MRS. CLAUS' DRESS:
Top/Shirt Part:
*If you've made my sweater pattern, this top part is done the same way. Only difference is your starting at the middle of the dress and going up vs. starting at the collar going down.
ch 27, turn
Rows 1-2: sc across, ch 1, turn (26)
SIDES:
Rows 1-2: sc 5 st, ch 1, turn (5)
MIDDLE:
Rows 1-2 sc 8 st, ch 1, turn (8)
Row 3: sc 5 st, ch 4 skip 4 st, sc 8st, ch 4 skip 4 st, sc 5 st, ch 1, turn
Row 4: sc across (26) END
Sleeves:
Round 1: sc 12 around hole (12)
Rounds 2-7: sc around (12)
Skirt:
*Start at the bottom of the top.
Row 1: *sc, inc* around (39)
Rows 2-9: sc across (39) END
*Hide all of your loose ends. For the fluffy parts hand sew them onto the coat. Same goes for the velcro/closure.
BOW:
ch 11, turn
Rows 1-5: sc across, ch 1, turn (10) END
*Hand sew the elastic to the bottom of the bow. Then use a piece of yarn to wrap around the middle and fasten on. Hide ends. Hand sew of fluffy parts.
And there you are! Two full outfits to celebrate the Christmas season! I had fun making these and I hope you do, too. Be sure to share what you make with me here or on Instagram @disneynuimosdiy. Have fun crafting!


Comments
Post a Comment