Posts

Showing posts with the label Shirt

Removing Donald's and Daisy's Shirts (And Making Them Usable)

Image
I know that there are quite of few of us out there in the nuiMOs community that just wonder, "Why didn't Disney make Donald's and Daisy's shirt removable?" They did it with Minnie from the beginning so I was always curious. Well, I finally got fed up with Donald's And Daisy's shirt being in the way with the different outfits Disney came out with and what I created. It was almost impossible to put them on and have it look right. I sat down and found out that it's a mini adventure doing this. Donald is by far easier than Daisy, and you'll see why. I decided that if I'm going to go through all the trouble of removing their shirts, I wanted to make sure that I could use the shirts again if I ever wanted to. Plus, it's kind of fun to see other nuiMOs wear their shirts. Hahaha. Here's What You'll Need: Small scissors Seam ripper Needle and thread Velcro or other closure Felt or other fabric  DONALD'S SHIRT As stated previously, I bega...
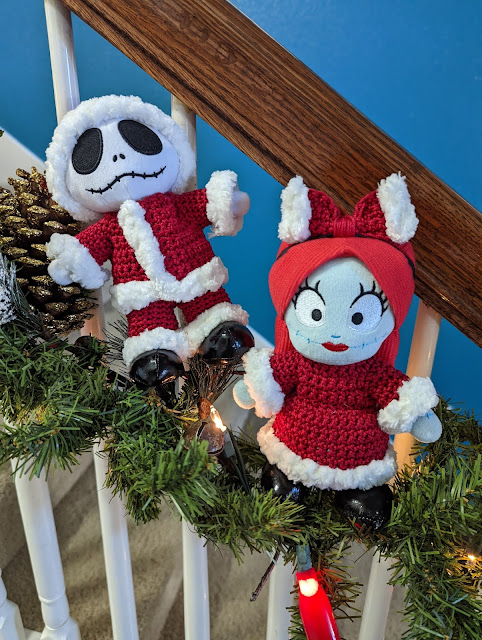
Crochet Mr. and Mrs. Santa Claus Outfits

Image
Almost a month ago I crocheted some Santa hats for my nuiMOs. I had run out of my crochet thread I made for Jack's hat and so I had to dress him in what I had available. Well, I finally found some crochet thread at Michael's that was the perfect match! So I finally got to work on making Jack and Sally cute Mr. and Mrs. Santa Claus outfits. (Or Mr. and Mrs. Sandy Claws, whatever you'd like.) I'm so happy with how they turned out. I'm going to be sharing the patterns on this blog post, so it's going to be a long one. Take your time when looking over and let me know if there are any mistakes. Please remember that these patterns are being shared for personal use only. Don't duplicate or make any products from these patterns for purchase. Thank you! What You'll Need: Red crochet thread (super fine 1) Fluffy white yarn/material E Hook (3.50 mm) Scissors Needle Thread Crochet stitch counter Velcro, or some other kind of closure  Elastic for bow American Abbre...

Shirt Tutorial

Image
The next tutorial is the shirt. You can find the pattern for this shirt with the patterns I shared before. You can use the regular and baggy patterns following this tutorial. This is probably the trickiest article of clothing to make. Adding the sleeves and the hem on the collar can cause sewing, but nothing has to be perfect so try not to stress. Here's what you'll need: Fabric pieces: one front, two back cut out mirror, two sleeve Velcro Thread         The first part to sew is the shoulders. Have the right sides touching making sure to line up the edges. The sew allowance is the width of the needle to the edge of the opening on the presser foot.     Now hem both of the sleeves with one fold about 1/8".     Now it's time for your first challenge: adding the sleeve. Layout the shirt pieces attached by the shoulders. The first photo shows where the sleeves should be inserted. Sew around carefully. If you have a couple of puckers, it's alright. Whe...

DIY Clothes Pattern (Part 1)

Image
 Okay. I really, really hope this works. This is my first times making some printable patterns, so there's probably going to be some hiccups. Let me know in the comments and I will try to figure it out. These should fit onto a 8.5" x 11" sheet of paper each, for scale. These patterns are designed with a very small seam allowance. (The collars of the shirts even more so.) You can make clothes by hand-sewing or use a machine. The hems are only one fold vs. the regular double-fold. Just makes it easier to handle. But this also means you're not going to want to use fabric that will fray a lot. For notions you will need 1/4" elastic black/white and some velcro. I bought a 2" thick velcro and then cut it into tiny 1/4" strips for the shirts. Show me your cute designs made with these patterns. I'm thinking of sharing some every now and then here on the blog as a showcase. Remember, you can also share on Instagram to @disneynuimosdiy.  Have fun creating!