Posts

Showing posts with the label Dress

New Dress Patterns And Tutorial

Image
It's been a long time coming, but here are some new sewing patterns! I posted a sneak peek on my Instagram about a month ago and I finally got around to making some for the tutorial. These are two new dresses. I'm calling them a Wrap Dress and a Empire Waist Dress. The Wrap Dress is a completely new dress while the Empire Waist Dress is made just like the gathered dress I did earlier, so follow the tutorial for this dress here . The only difference is that didn't make the skirt portion as poofy. I know it can be hard to print these off. I may have a new way to share these but I'm not sure yet. So, for now, save the image and print to fill the whole page. The page size I've based these on should be 8.5" x 11". Please remember anything you make if just for personal use. Don't resell these patterns as your own or sell finished pieces made from these patterns. Thanks. =) WRAP DRESS TUTORIAL Here's What You'll Need: Fabric Thread Velcro (or other cl...
Crochet Mr. and Mrs. Santa Claus Outfits

Image
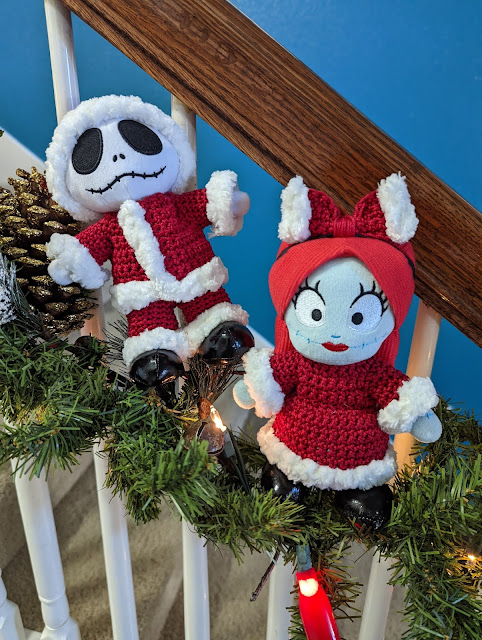
Almost a month ago I crocheted some Santa hats for my nuiMOs. I had run out of my crochet thread I made for Jack's hat and so I had to dress him in what I had available. Well, I finally found some crochet thread at Michael's that was the perfect match! So I finally got to work on making Jack and Sally cute Mr. and Mrs. Santa Claus outfits. (Or Mr. and Mrs. Sandy Claws, whatever you'd like.) I'm so happy with how they turned out. I'm going to be sharing the patterns on this blog post, so it's going to be a long one. Take your time when looking over and let me know if there are any mistakes. Please remember that these patterns are being shared for personal use only. Don't duplicate or make any products from these patterns for purchase. Thank you! What You'll Need: Red crochet thread (super fine 1) Fluffy white yarn/material E Hook (3.50 mm) Scissors Needle Thread Crochet stitch counter Velcro, or some other kind of closure  Elastic for bow American Abbre...

Crochet Overall Dress

Image
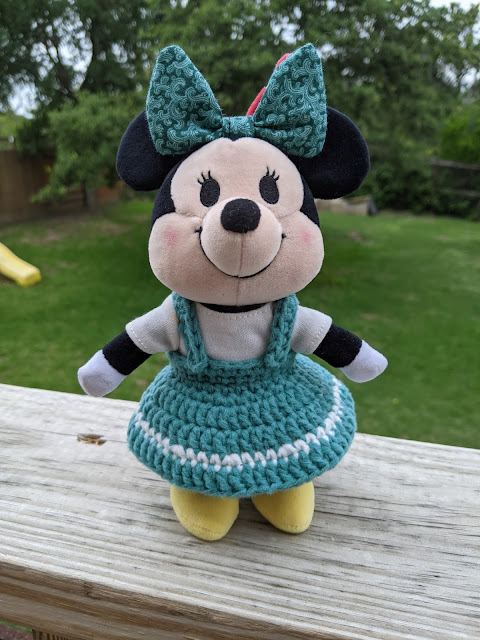
I almost forgot about the pattern for this cute number. I should've created this one before I did the other dresses . This one by far a lot easier than those ones, especially for those just starting out crocheting in the round. Remember, I'm located in America so the pattern abbreviations are accordingly so. And, as usual, I'm sharing these patterns in good faith. Please don't sell the pattern or any product made from it. Thanks! What you'll need: Thinner yarn (Two colors if you want yours like mine.) 3.5 mm (E) hook Scissors Stitch marker Yarn needle  Abbreviations: MAR = magic adjustable ring  st = stitch sc = single crochet dc = double crochet sl st = slip stitch inc = increase stitch inv dec = invisible decrease *...* = repeat inside as indicated    DRESS: SKIRT: ch 30, sl st Rnd 1: sc around (30) Rnd 2: *sc 4 st, inc* x 6 (36) Rnd 3: ch 2, *dc 2 st, inc* x 12, sl st (48) Rnd 4: ch 2, dc around, sl st (48) Rnd 5: [Contrast Color] ch 1, *sc 3 st, inc* x 12,...

Crochet Dresses, Bow, and Beret

Image
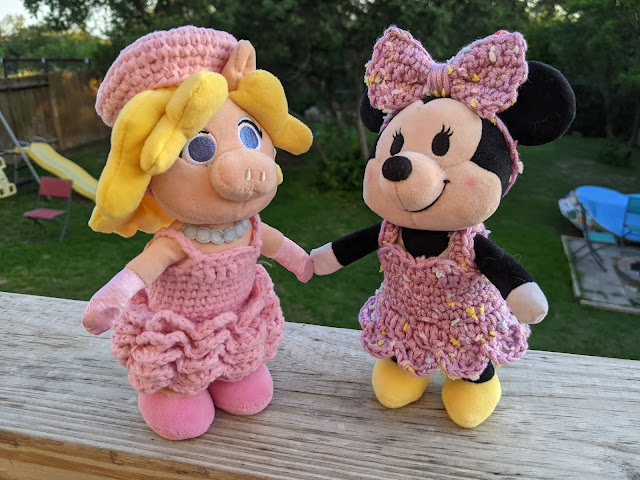
It's time for more crochet patterns! I finally got a hold of some yarn that I thought would be the perfect thickness to make some cute outfits for my nuiMOs. I wanted thinner stuff because detail work is so much better when you have more stitches to work with. I was going for a different kind of dress but I need to rehearse myself in lace-work to get the feeling I want. Right off the bat I will tell you that Minnie's dress is easier to start off with. Both dresses have the same start but it's the bottom that makes Miss Piggy's dress a bit more difficult. No matter what, I hope you take the chance to make all of these items. At the moment I'm unsure about the fit of these dress for Daisy. From what I understand Daisy's got back so it may lie a bit different on her. I'm thinking of adopting her and her main man pretty soon, though, so I can make sure these patterns fit all nuiMOs. As always I share these patterns in good faith. Please don't use these patte...

Overalls Dress Tutorial

Image
The last tutorial as part of the patterns I have shared is here. This is to make a cute overall dress. It's meant to be a tight fit since the skirt is based off of Minnie's dress. Here's what you'll need: The overalls front piece Two overall straps pieces One tight skirt piece Thread Sewing Needle Velcro     Hem the bottom curve of the skirt with a one fold hem about less than a 1/4" width.   Now take the overalls front piece and add hems to the sides and then on the top. The second photo shows what the piece should look like when you're done with these steps.     Add the overalls top piece to the skirt when you sew the hem to the top of skirt. Try to center it if you can, if not it's not a big deal. As you can see mine isn't.   Sew the hems on the sides of the skirt and add the velcro.   The finals step is to hand sew the straps to the overalls front and back of the skirt. The placement for the front is easy. You'll have to slip the dress onto you...

Gathered Dress Tutorial

Image
Here's another tutorial based on the patterns that have been shared at this point. You start off by making a shirt and then add a skirt to the bottom to make the dress. Here's what you'll need: Fabric pieces: everything for a shirt and a rectangle piece 3.5" x 12" Velcro Thread Optional Embellishments       Follow the shirt tutorial all the way to hemming the collar.     Hem the bottom of the skirt/rectangle. This hem is double folded at about 1/4" in width.     Add whatever embellishments you want on the skirt at this point.     Now it's time to start the gathering process. You'll have to change your stitch length to 5 as shown in the first photo above. Then you'll sew two lines across the top edge 1/8" apart.     Use the two lines that were sewn to gather the fabric evenly. You'll have to make sure that the length of the skirt top matches the length of the shirt. Once you get to that point, sew across as shown above.   ...