Shirt Tutorial
The next tutorial is the shirt. You can find the pattern for this shirt with the patterns I shared before. You can use the regular and baggy patterns following this tutorial. This is probably the trickiest article of clothing to make. Adding the sleeves and the hem on the collar can cause sewing, but nothing has to be perfect so try not to stress.
Here's what you'll need:
- Fabric pieces: one front, two back cut out mirror, two sleeve
- Velcro
- Thread

The first part to sew is the shoulders. Have the right sides touching making sure to line up the edges. The sew allowance is the width of the needle to the edge of the opening on the presser foot.
Now hem both of the sleeves with one fold about 1/8".
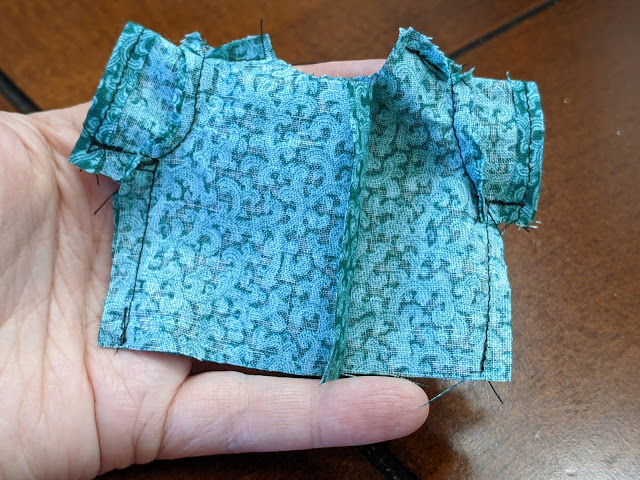
Now it's time for your first challenge: adding the sleeve. Layout the shirt pieces attached by the shoulders. The first photo shows where the sleeves should be inserted. Sew around carefully. If you have a couple of puckers, it's alright. When you dress your nuiMO it will look fine. The third photo above shows what it should look like when you have both sleeves attached.
You'll have to shift around your fabric to get the edges of the sleeves and shirt sides to come together. Sew down the sleeve and the side in one motion. The third photo above shows how it will look when you have both sides sewn down.
The second challenge: the collar. This is the smallest hem on the entire shirt. Again, take it slow and sew across the entire top.
Next, hem the bottom with a one fold. It's about 1/4" wide.
The final hemming to do is the edges of the shirt. This is where you will add the velcro.
Turn your shirt right side out and you're done! You've made a shirt for your nuiMOs to where and enjoy. Make sure to share your creations on Instagram with @disneynuimosdiy or on here. Have fun creating!


So much is possible with this pattern!!
ReplyDeleteThank you for this tutorial. This is my first time making doll clothing and this us super easy to follow
ReplyDelete