Cardboard nuiMOs House (Day Two)
The cardboard house for my Mickey and Minnie nuiMOs was a bit of an undertaking. It did end up taking two days just to construct and then decorate the exterior. If you haven't already, go to the Day One post to catch up to where I am at this point. From here it's just adding decorative touches and a railing to the patio.
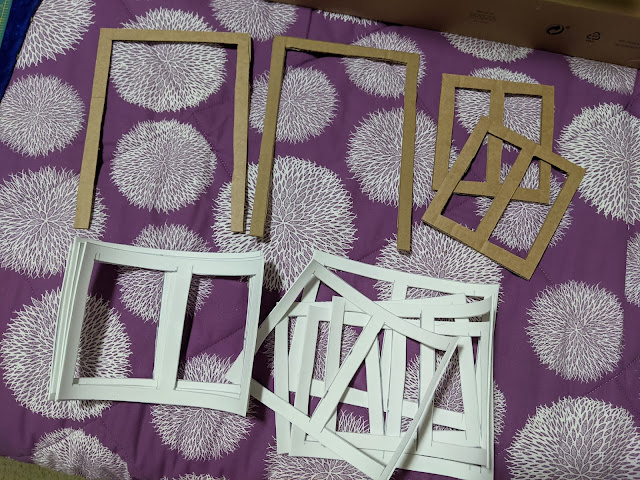
The first thing I did on Day Two was making the door and window frames. I originally started cutting out the frames using cardboard, but by the time I had cut out the two front windows I was ready to call it quits. I then remembered I has a roll of extra EVA (craft) foam for cosplay purposes. I thought this would be the best material to use for ease of cutting and still being a sturdy material. All of these frames are a 0.5" thick.
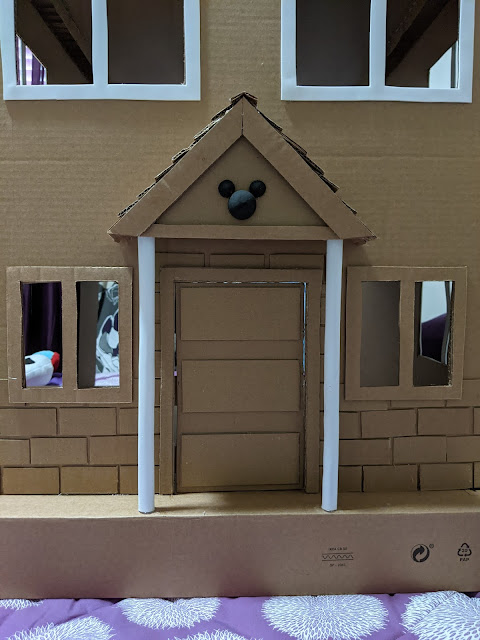
Right above the top windows on the front I felt like something was missing all of Day One. I had the hardest time figuring out what to do. I then remembered we had a Mickey head pancake silicone mold than I could use as a stencil. So I traced it on there and then decided it needed some depth to it. On the inside I cut up thin strips of cardboard to imitate wood and filled the center. I then used some EVA foam shaped like rocks around the perimeter of the Mickey.
I decided that the small room exterior needed more detail. I decided to use the same bricks along the top and bottom in a vertical pattern. I guess I failed to mention the strips along the top just above the new bricks. I needed something to help attach the patio railing so I glued these strips but only halfway on so there would be something to glue popsicle sticks to.
After tearing out the old columns on Day One, I needed another option. I had out these bamboo dowels for the patio railing and I thought these could look good on the front. I was able to trim them down a bit and then cover them in EVA foam. I attached them to the house and they needed more dimension. So I took four small strips of EVA foam and wrapped them on the base and the bottom of the columns. I think it helps them look more like columns than just poles. Also you can see under the Mickey I added a strip of cardboard to give the porch cover some balance.
The next thing was to add the patio railing. I started by gluing popsicle sticks where I thought support would be needed. In the corner I glued two of them together to give a nicer finished look. I then trimmed down bamboo dowels and put them where I wanted. To give a better overall look, I then added popsicle sticks to the other side of the dowels. To do the corner I split one popsicle stick in half and glued in place.
The last little detail to accomplish was the door handles. I used thin cardboard for these so I could easily bend the handles into a curved shape. I cute four small rectangles and strips. I curved the strips and folded the ends. I then used those ends to glue the handles onto the base. Then, finally, I glued two handles to each door.
And the construction of the structure and exterior is done! The next thing on the to-do list is to paint. I'm still deciding on what colors exactly but I know that there's a lighter wood and gray bricks. I'll just have to decide the rest of it, hahaha. I think I'm even going to cover the lower box with some black and green felt afterwards to make it feel even more finished.
Thanks for reading! If you try to make a house, let me see! You can share with me here in the comments or on Instagram with @disneynuimosdiy. Have fun crafting!


Brilliant!!! You're so clever!
ReplyDelete