NuiMOs Bed
The next item of furniture was a bed! I ended up making four of these and now I wondering if I should've made a bunk-bed instead to save space. I might still covert these into bunk-beds but for now they are individual.
Here's what you'll need:
- Foam Core Board and/or Cardboard
- Hot Glue and Hot Glue Gun
- Cutters
- Craft Foam
- Popsicle Sticks
- Tin Snips

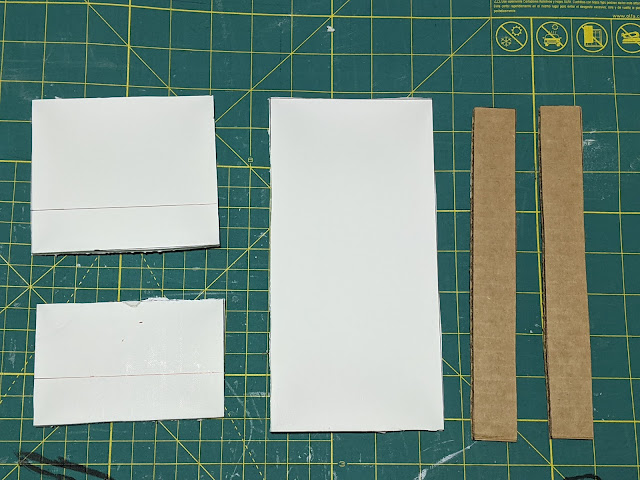
To start off you'll need to cut out: 4" x 8", 4.25" x 3.25", 4.25" x 2.75", and 1" x 8" (x2). Mark the pieces that are 4.25" wide at the 1" height all the way across as pictured above.
That 1" line is where you will take the largest piece and glue it with the top of the piece lining up with the line. You'll then take the long skinny pieces and glue them to the sides. This is the bed structure.
The next part is to just make it look appealing. I used craft foam to cover the sides of the bed and then long the top of the headboard and footboard. I also made a piece to cover the top of the 'mattress' part to make it look more finished.
I then used popsicle sticks to cover both sides of the headboards and footboards.
And finally to add some extra Disney magic I glued a foam Mickey to the front of the footboard. And that's all for the bed. I hope that you're able to follow along with this. If I do ever convert these into bunk-beds I will share the process.
Share here what you've created or with @disneynuimosdiy on Instagram. Have fun crafting!


Comments
Post a Comment